画像生成AIのひとつであるStable Diffusionをローカル環境で使用できるように構築するStable Diffusion Web UI (AUTOMATIC1111) のインストール方法を紹介します。
実行環境
| OS | Windows11 23H2 |
| AUTOMATIC1111 | v1.9.4 |
インストール手順
今回は、NVIDIA(推奨)のグラフィックボード+Windowsの環境でインストールする方法を2つ紹介します。基本的にPythonとGitも一緒にパッケージ化されている方法1でいいと思います。
方法1
ファイルのダウンロードと解凍
下のリンクからsd.webui.zipをダウンロード
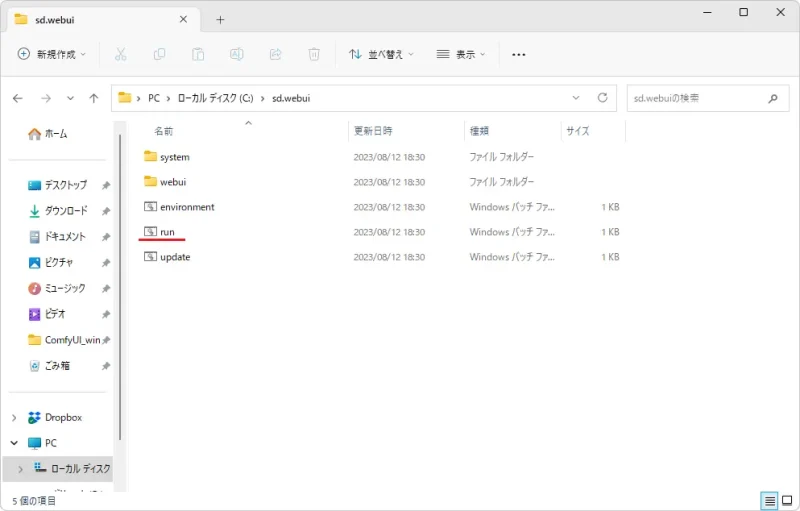
zipファイルをお好きな場所で解凍(すべて展開)してください。
batファイル実行
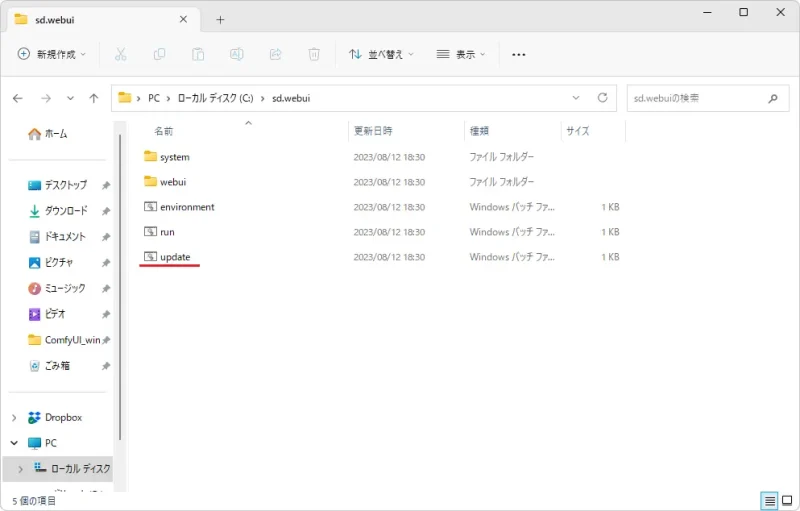
まずは、update.batを実行して最新バージョンにアップデートします。
アップデートが終わったら何かキーを押すとコマンドプロンプトが閉じます。
run.batを実行します。
初回起動時は、ファイルのダウンロードなどで時間がかかります。
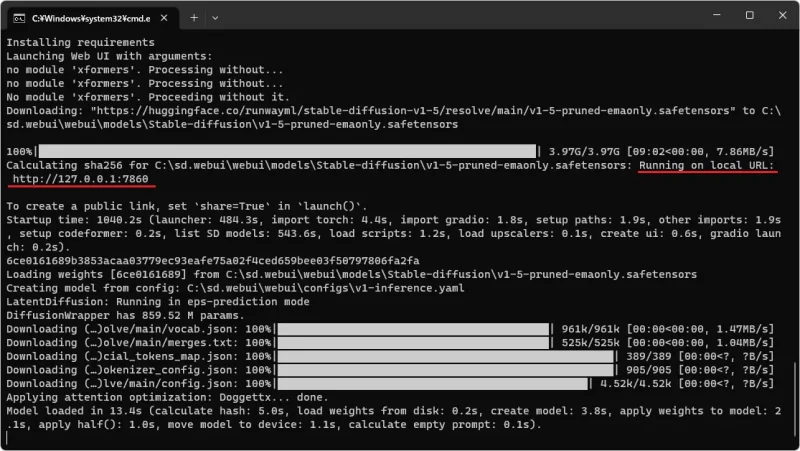
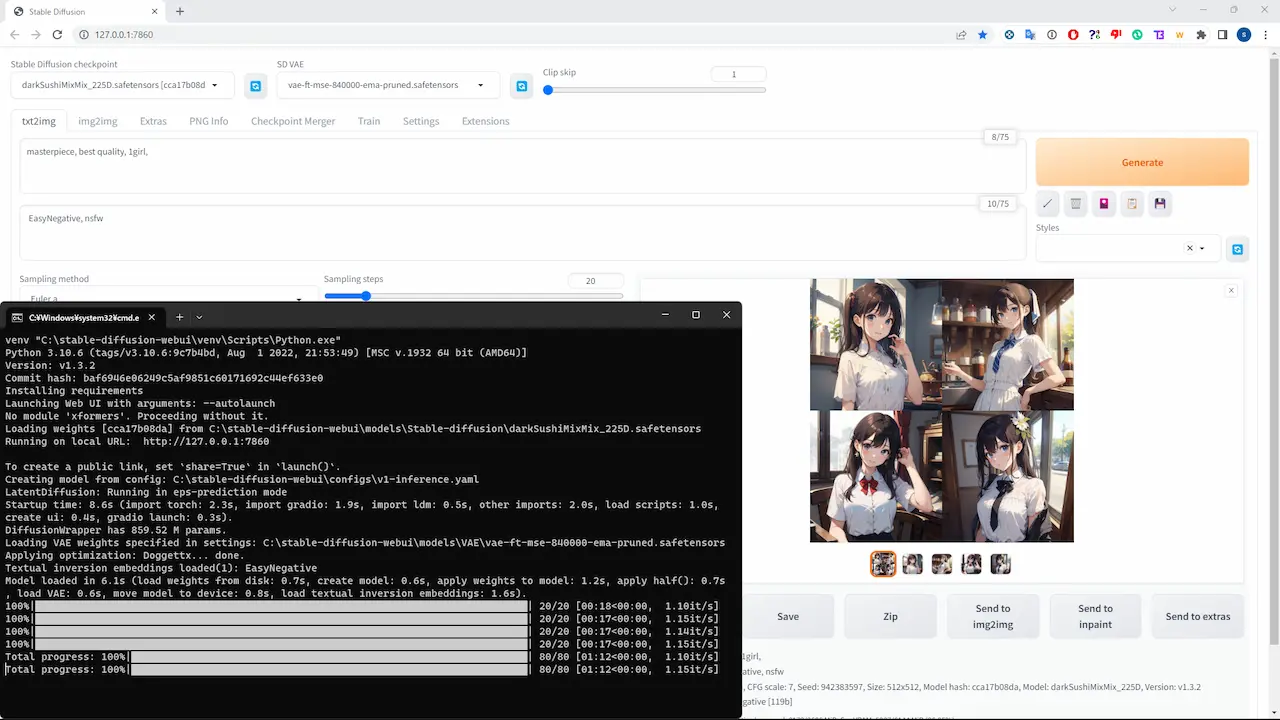
正しくインストールされるとRunning on local URL: http://127.0.0.1:7860というメッセージが表示されブラウザが起動します。
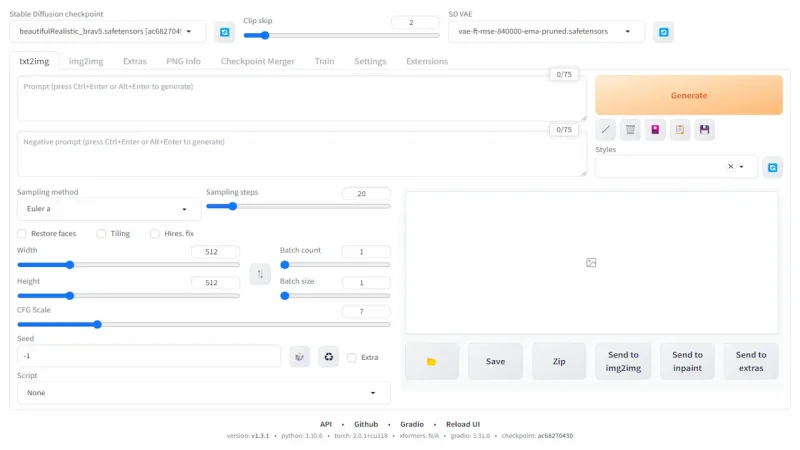
こちらがStable Diffusion Web UI (AUTOMATIC1111) の生成画面になります。Generateで画像を生成することができますがいろいろな設定項目があるので以下の記事を参考にしてください。
方法2
Git インストール
GitHubからリポジトリをクローンするのに使います。
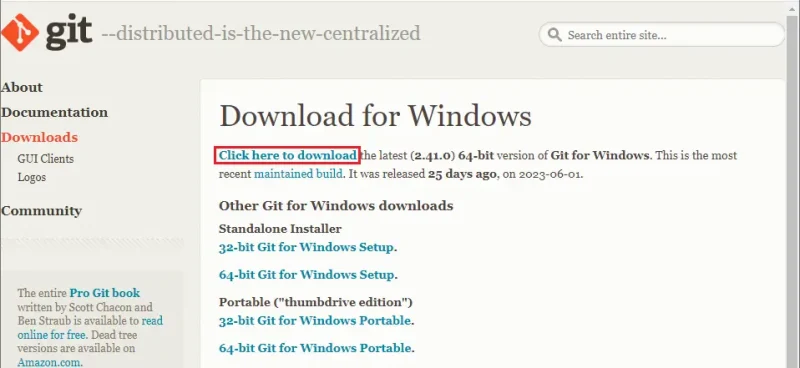
Click here to downloadから最新版がダウンロードできます。ダウンロードしたら起動してください。
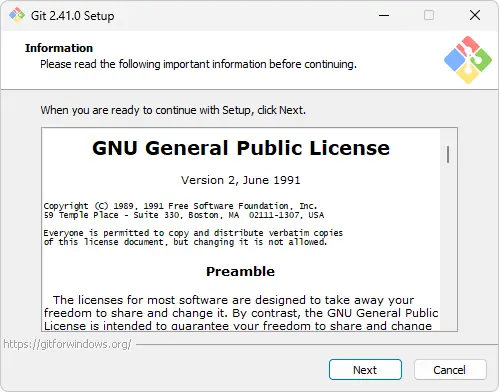
特に設定する項目はないのでひたすらNextでSetupを進めてください。
Python 3.10.6 インストール
Pythonをインストールします。現在バージョンは3.10.6が指定されています。(マイクロバージョンは後方互換性が高いので新しいので大丈夫そうですが)
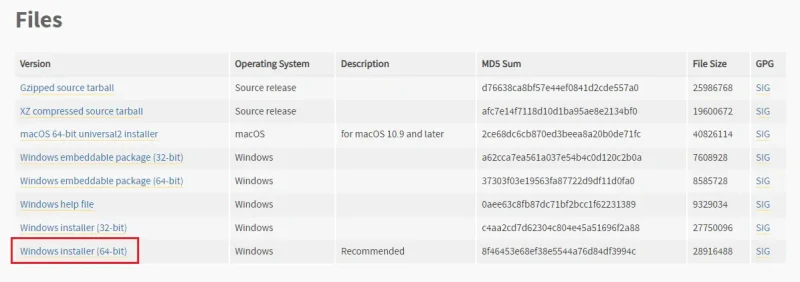
Windows installer (64-bit) ダウンロードして起動
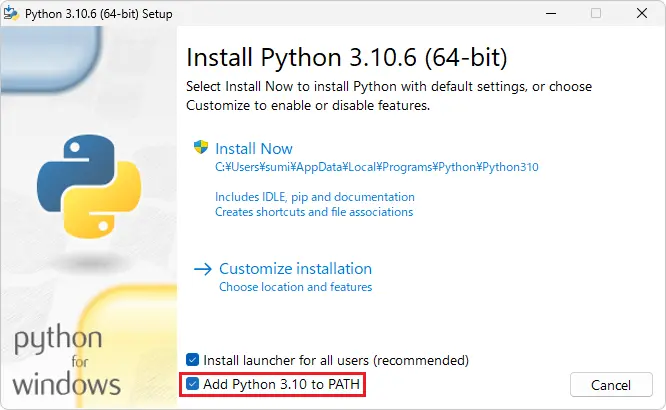
Add Python 3.10 to PATHにチェックを入れてインストールを進めてください。
ファイルのダウンロード
Stable Diffusion Web UI (AUTOMATIC1111) のファイルをダウンロードします。
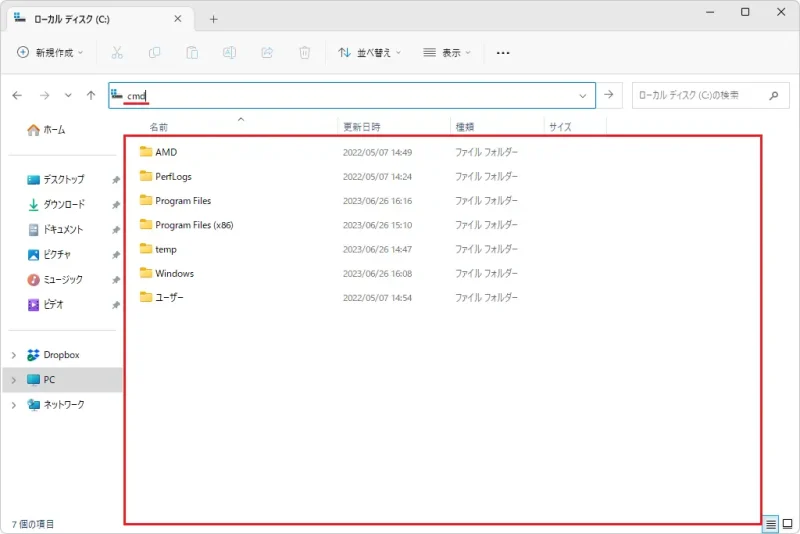
エクスプローラーでダウンロードしたい場所にアクセスしたらアドレスバーにcmdと入力してEnterでコマンドプロンプトを起動します。
下のコードを入力してEnter
git clone https://github.com/AUTOMATIC1111/stable-diffusion-webui.git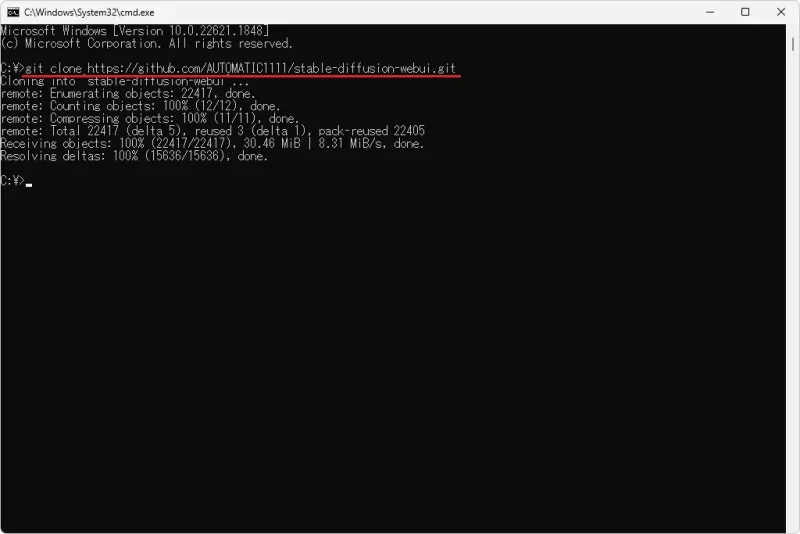
指定した場所にStable Diffusion Web UI (AUTOMATIC1111) のファイルがダウンロードされます。
batファイル実行
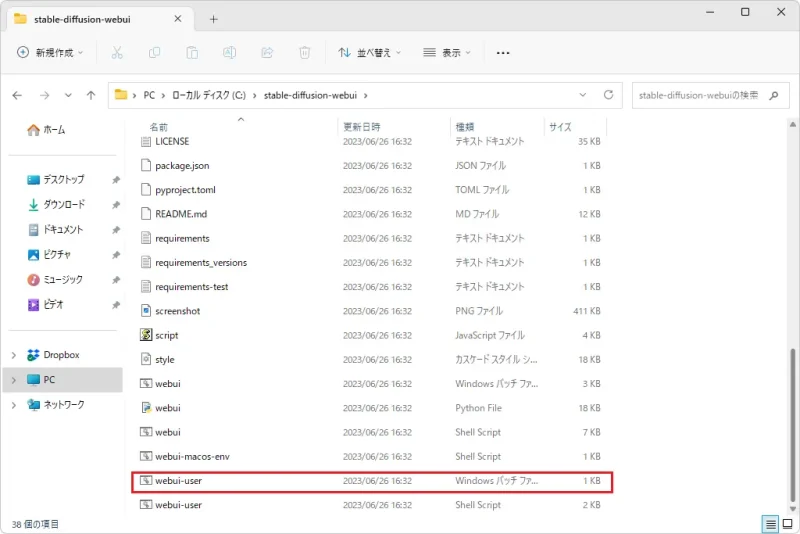
ダウンロードされたフォルダ内のwebui-user.batを実行します。
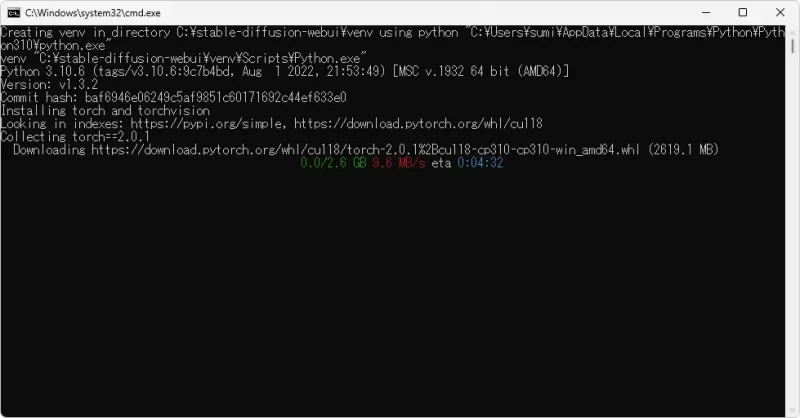
初回起動時は、ファイルのダウンロードなどで時間がかかります。
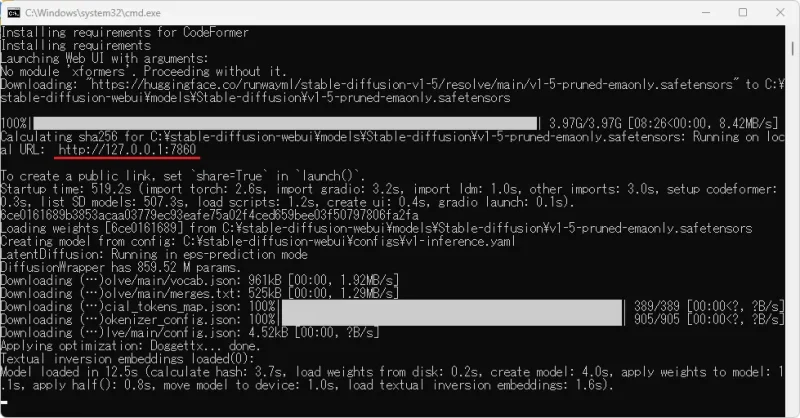
正しくインストールされるとRunning on local URL: http://127.0.0.1:7860というメッセージが表示されブラウザが起動します。ブラウザが起動しない場合はコマンドプロンプトは閉じずにhttp://127.0.0.1:7860を開いてください。
コマンドライン引数の追加
webui-user.batを編集してコマンドライン引数を追加することによっていくつかの最適化を行うことができます。
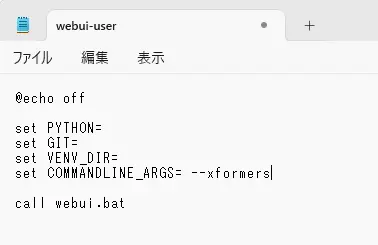
COMMANDLINE_ARGS=の後にオプションを記述します。
おすすめのコマンドライン引数
VRAM使用量の減少とパフォーマンスの向上(同一Seedでの生成結果に少し違いが出る)
--xformersVRAM使用量を減らす(パフォーマンスは若干低下します)
--medvram--opt-sub-quad-attentionトラブルシューティング
生成された画像が黒や緑になる場合
--precision full --no-halfNansException: A tensor with all NaNs was produced in VAEの場合
--no-half-vaeほかにもあるので気になる方はチェックしてみてください。