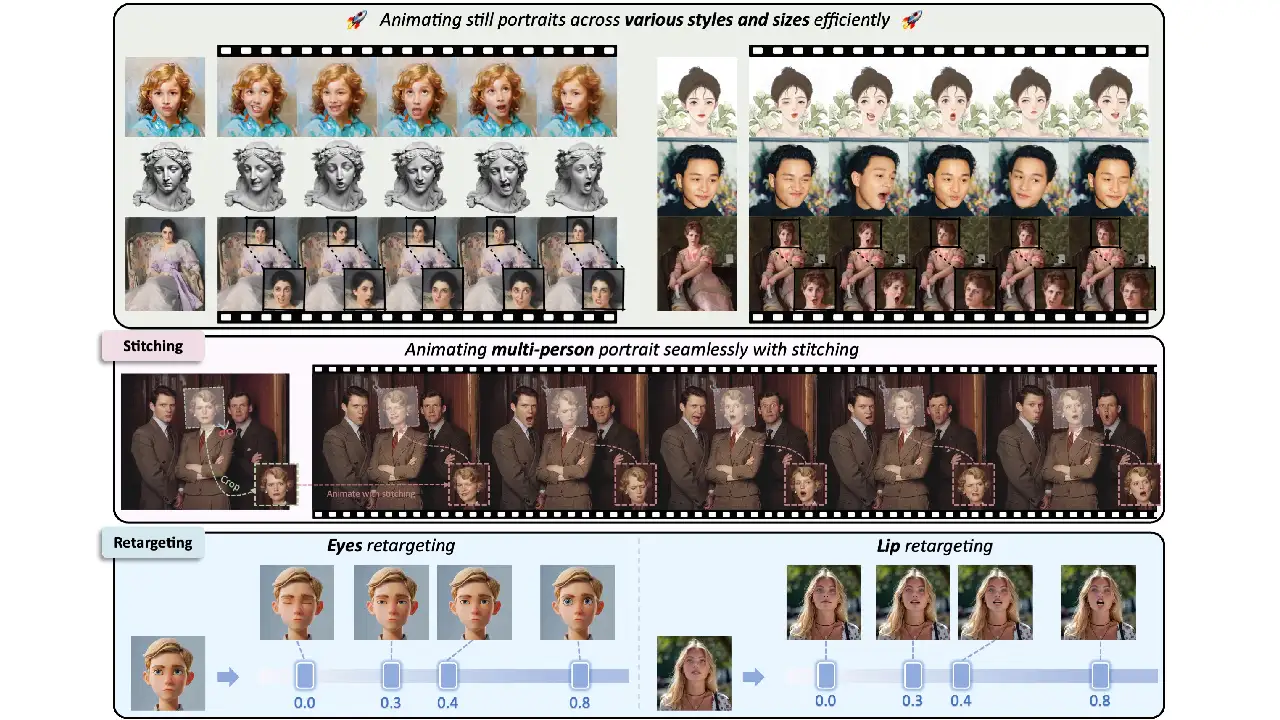
LivePortraitでは、ビデオから得られたモーション(顔の表情や頭のポーズなど)を使用して、リアルなビデオを合成することができます。
実行環境
| OS | Windows11 23H2 |
| LivePortrait | b370d8059c4794ad2afce2db404e2aa5450e098c |
ソフトウェア要件
インストール前に必要なソフトがあります。パッケージでのインストールなら不要です。
Git
Gitは分散型バージョン管理システムで、GitHubのリポジトリ管理に使用されます。
Miniconda
condaを使用して、仮想環境を作成します。
インストール
パッケージ版
cleardusk/LivePortrait-Windows at mainからファイルをダウンロードして解凍し、run_windows.batを実行するだけで使用できるようになります。
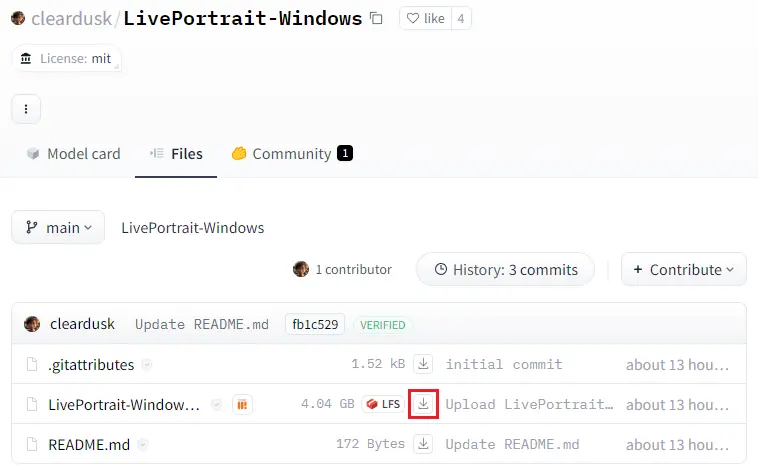
LivePortrait-Windowsというファイルをダウンロードして解凍してください。容量が大きいためWindows標準の解凍機能では時間がかかりました。7Zipでの解凍をおすすめします。
マニュアルインストール
Anaconda Prompt (miniconda3)を開きます。
リポジトリをクローン
git clone https://github.com/KwaiVGI/LivePortraitディレクトリ移動
cd LivePortrait仮想環境を作成
conda create -n LivePortrait python==3.9.18仮想環境をアクティブ化
conda activate LivePortrait要件をインストール
pip install -r requirements.txtファイルのダウンロード
insightfaceとliveportraitをダウンロードして解凍したフォルダをpretrained_weights内に配置してください。
pretrained_weights
│  .gitkeep
│
├─insightface
│  └─models
│      └─buffalo_l
│              2d106det.onnx
│              det_10g.onnx
│
└─liveportrait
    │  landmark.onnx
    │
    ├─base_models
    │      appearance_feature_extractor.pth
    │      motion_extractor.pth
    │      spade_generator.pth
    │      warping_module.pth
    │
    └─retargeting_models
            stitching_retargeting_module.pth
推論
Stitching
Gradioデモを実行
python app.pyRunning on local URL: http://127.0.0.1:8890を開く
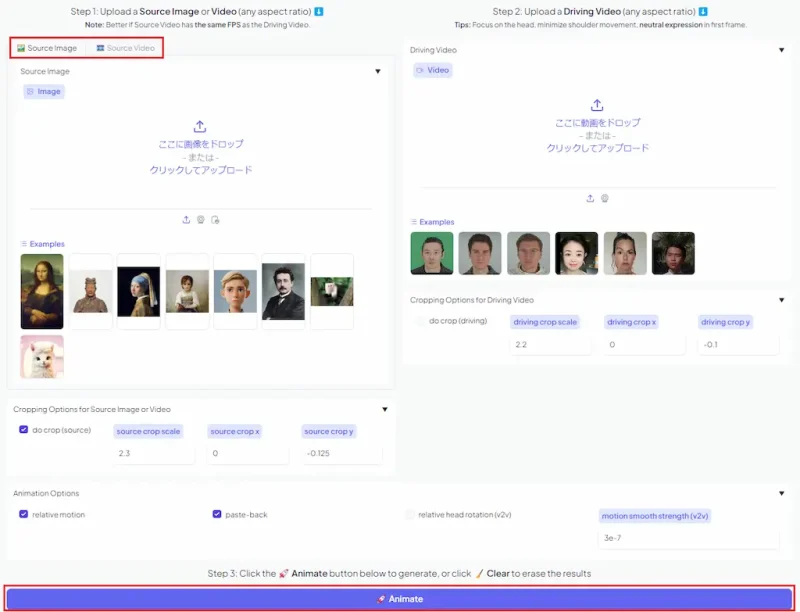
ソースとなる画像または動画と、合成したい表情の動画をアップロードしてAnimateをクリックすると生成が開始されます。
サンプルで試した生成結果になります。VRAM使用量は3GB程度でした。
Retargeting
ソース画像の目と口の開きを編集するリターゲティングという機能もあります。
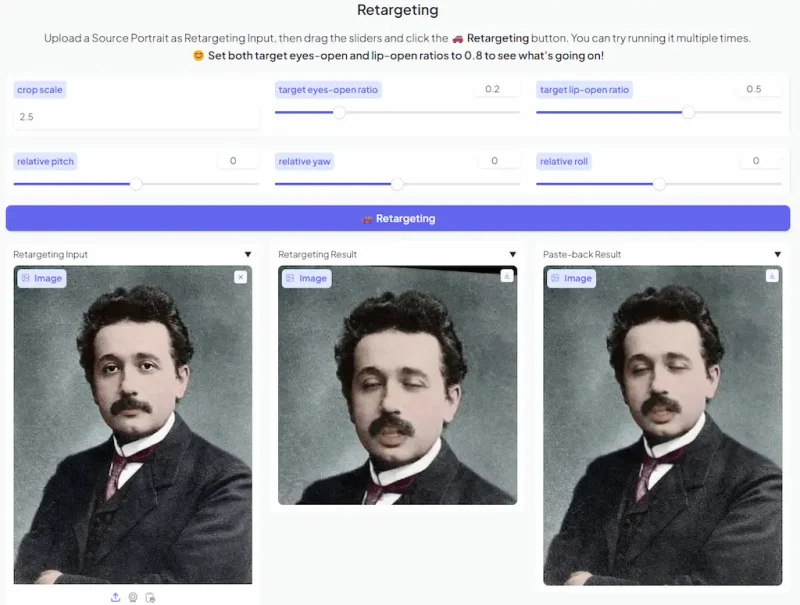
target eyes-open ratioやtarget lip-open ratioの数値を変更して試してください。